Hexo provides a fast and easy deployment strategy. You only need one single command to deploy your site to your servers.
$ hexo deploy |
Before your first deployment, you will have to modify some settings in _config.yml. A valid deployment setting must have a type field. For example:
deploy: |
You can use multiple deployers. Hexo will execute each deployer in order.
deploy: |
Git
Install hexo-deployer-git.
$ npm install hexo-deployer-git --save |
Edit settings.
deploy: |
| Option | Description |
|---|---|
repo |
GitHub/Bitbucket/Coding/GitLab repository URL |
branch |
Branch name. The deployer will detect the branch automatically if you are using GitHub or GitCafe. |
message |
Customize commit message (Default to Site updated: {{ now('YYYY-MM-DD HH:mm:ss') }}) |
Heroku
Install hexo-deployer-heroku.
$ npm install hexo-deployer-heroku --save |
Edit settings.
deploy: |
| Option | Description |
|---|---|
repo, repository |
Heroku repository URL |
message |
Customize commit message (Default to Site updated: {{ now('YYYY-MM-DD HH:mm:ss') }}) |
Netlify
Netlify provides continuous deployment services, global CDN, ultra-fast DNS, atomic deploys, instant cache invalidation, automatic HTTPS, a browser-based interface, a CLI, and many other features for managing your Hexo website.
Go to https://app.netlify.com/signup and select your preferred signup method. This will likely be a hosted Git provider, although you also have the option to sign up with an email address.
There are two different ways to deploy your sites on Netlify. The most common way is to use the web UI. The following examples use GitHub, but other git providers will follow a similar process.
- Create a Netlify account
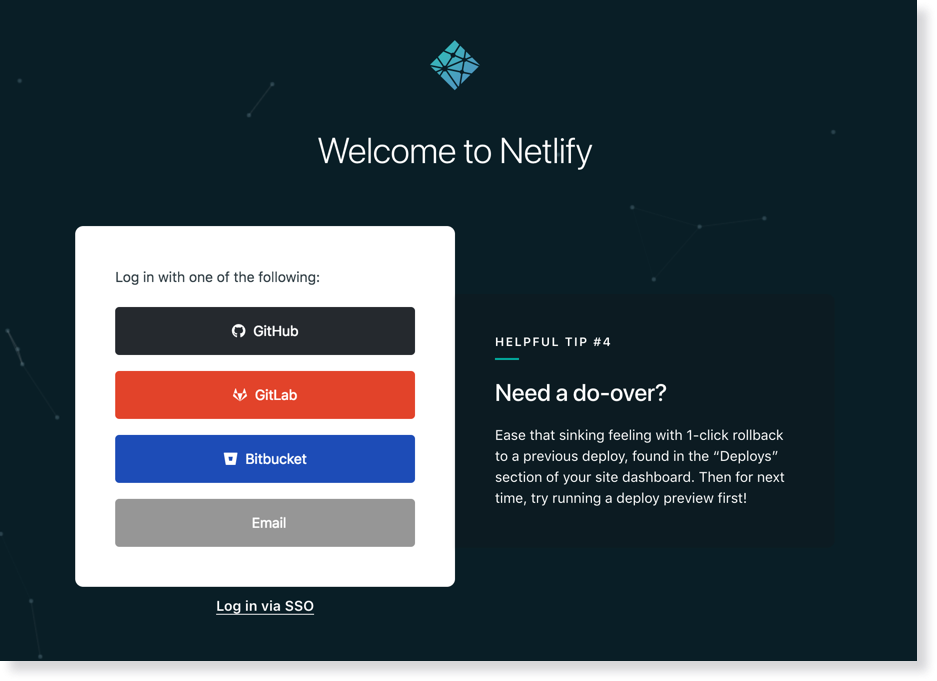
Selecting GitHub will bring up an authorization modal for authentication.

- Create a new site with continuous deployment
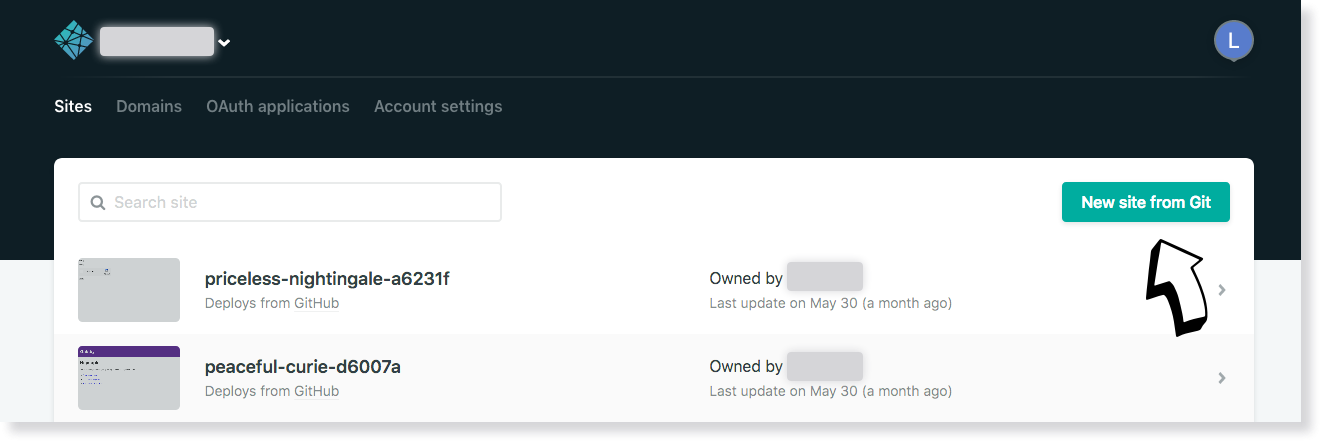
You’re now already a Netlify member and should be brought to your new dashboard. Select “New site from git.”
Netlify will then start walking you through the steps necessary for continuous deployment. First, you’ll need to select your git provider again, but this time you are giving Netlify added permissions to your repositories.
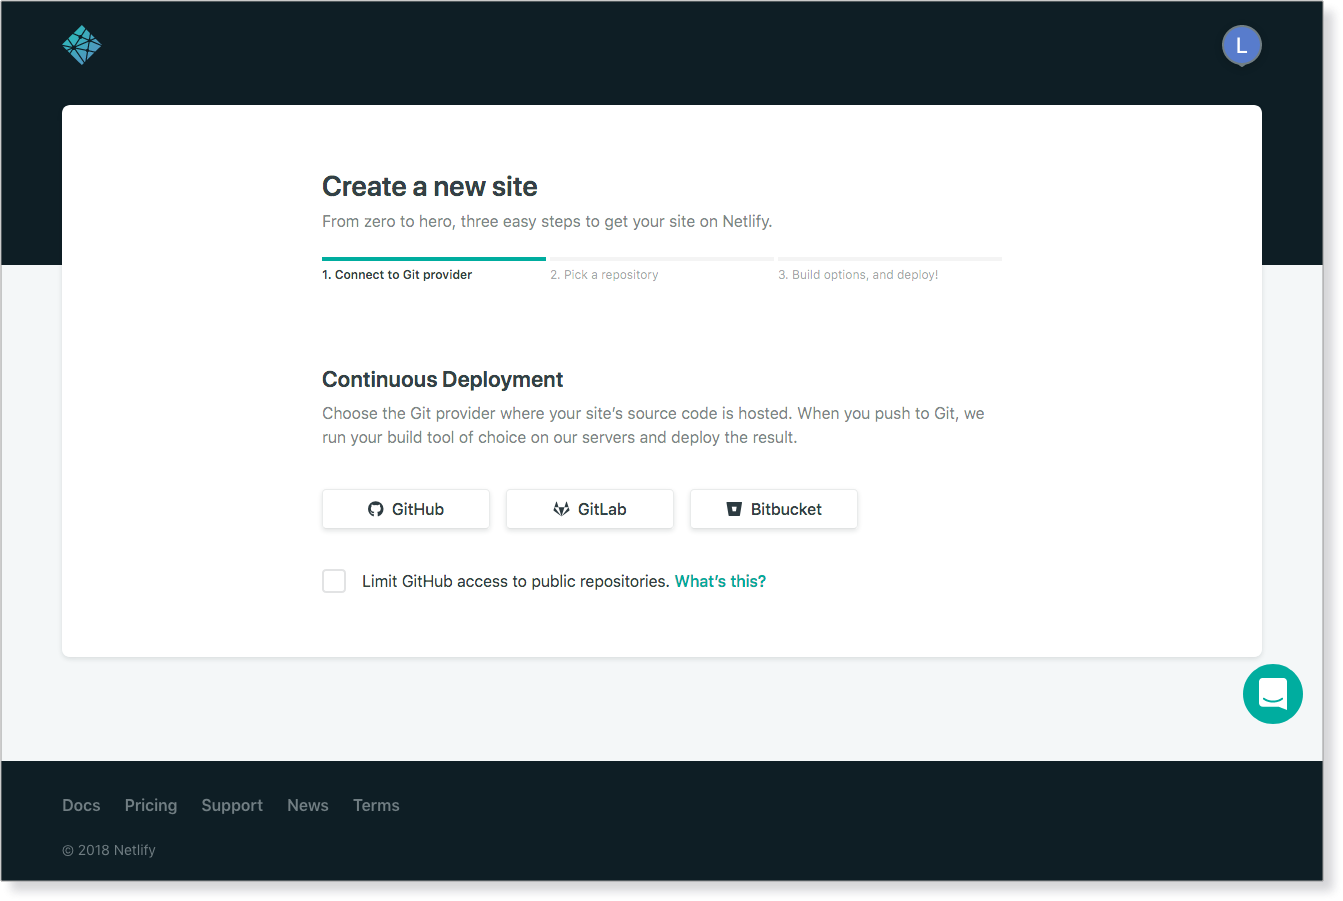
And then again with the GitHub authorization window:

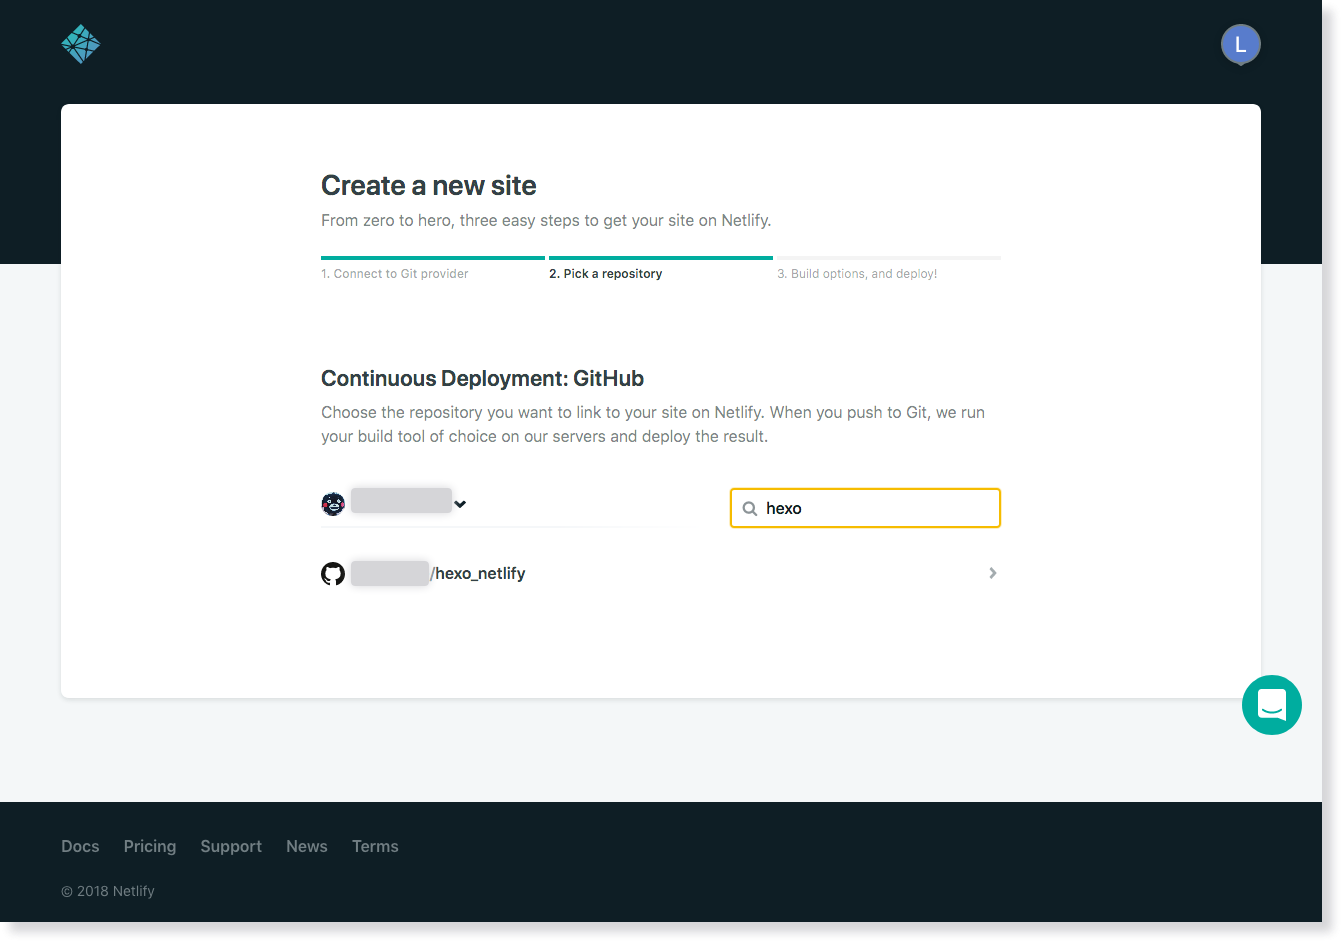
Select the repo you want to use for continuous deployment. If you have a large number of repositories, you can filter through them in real time using repo search:
Once selected, you’ll be brought to a screen for basic setup. Here you can select the branch you wanted published, your build command, and your publish (i.e. deploy) directory.
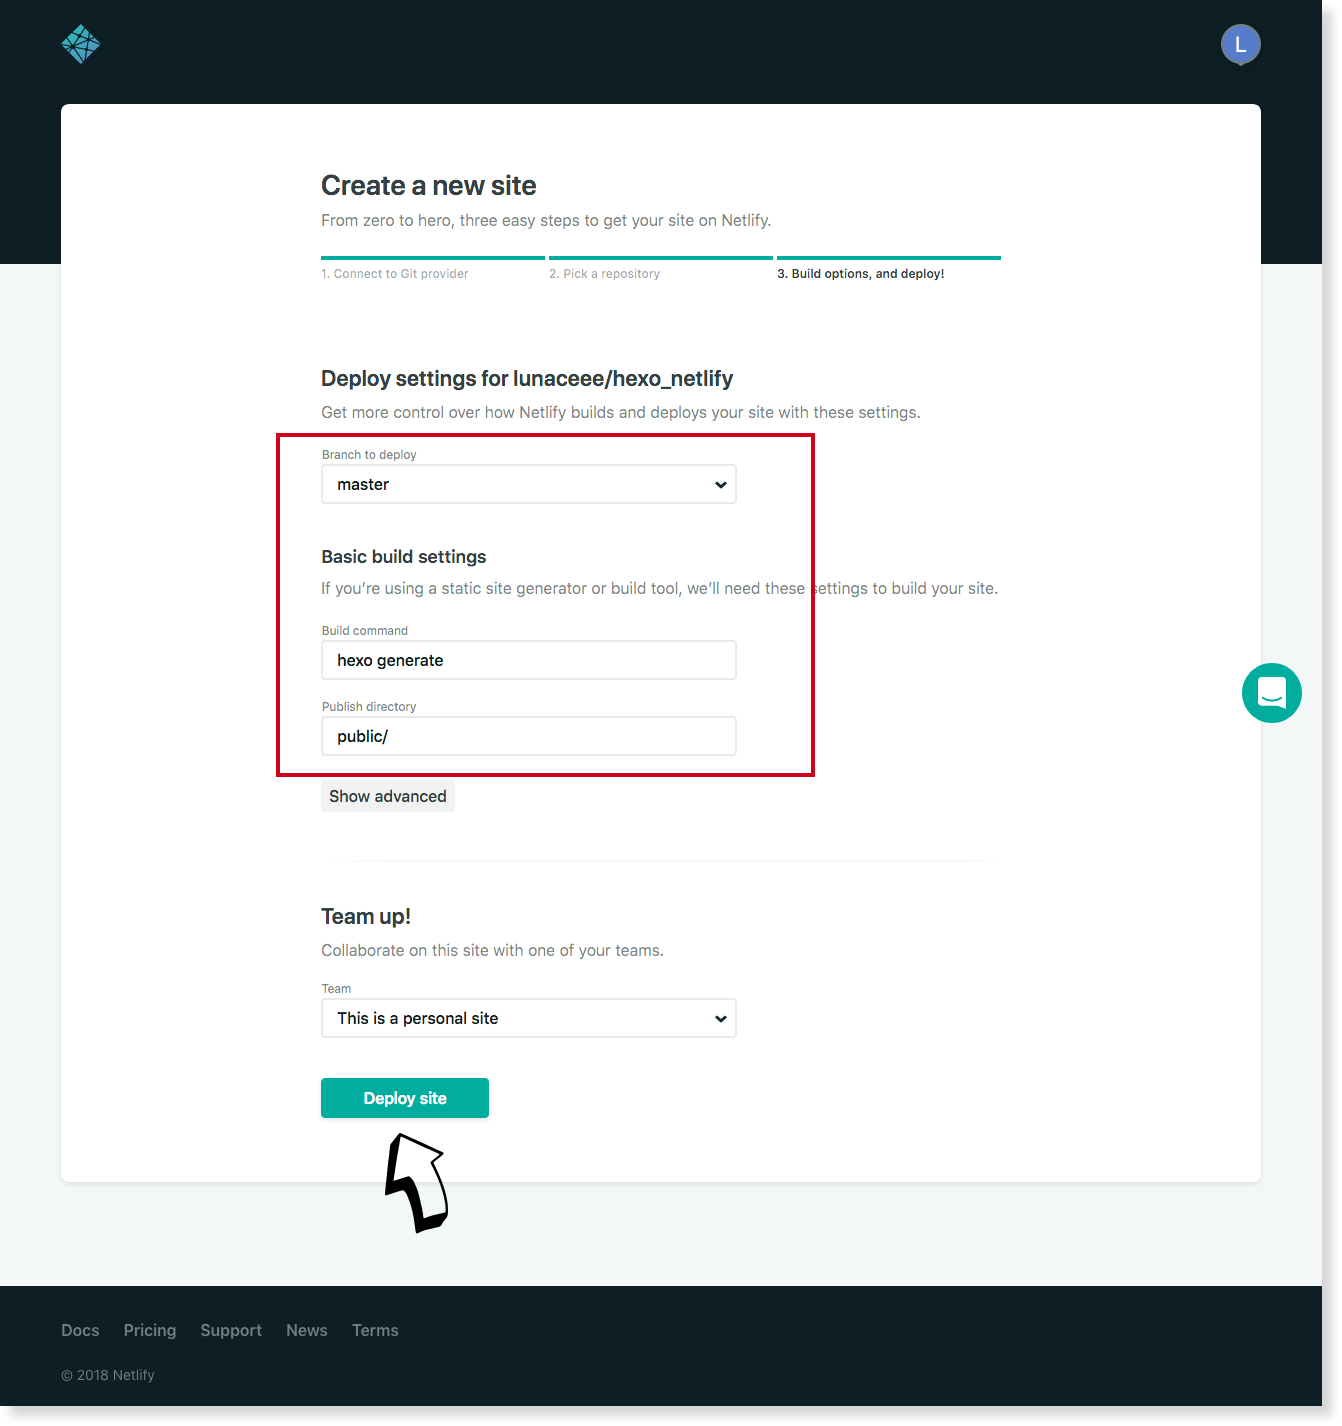
The publish directory should mirror that of what you’ve set in your site configuration, the default of which is “public”.
- Build and Deploy Site
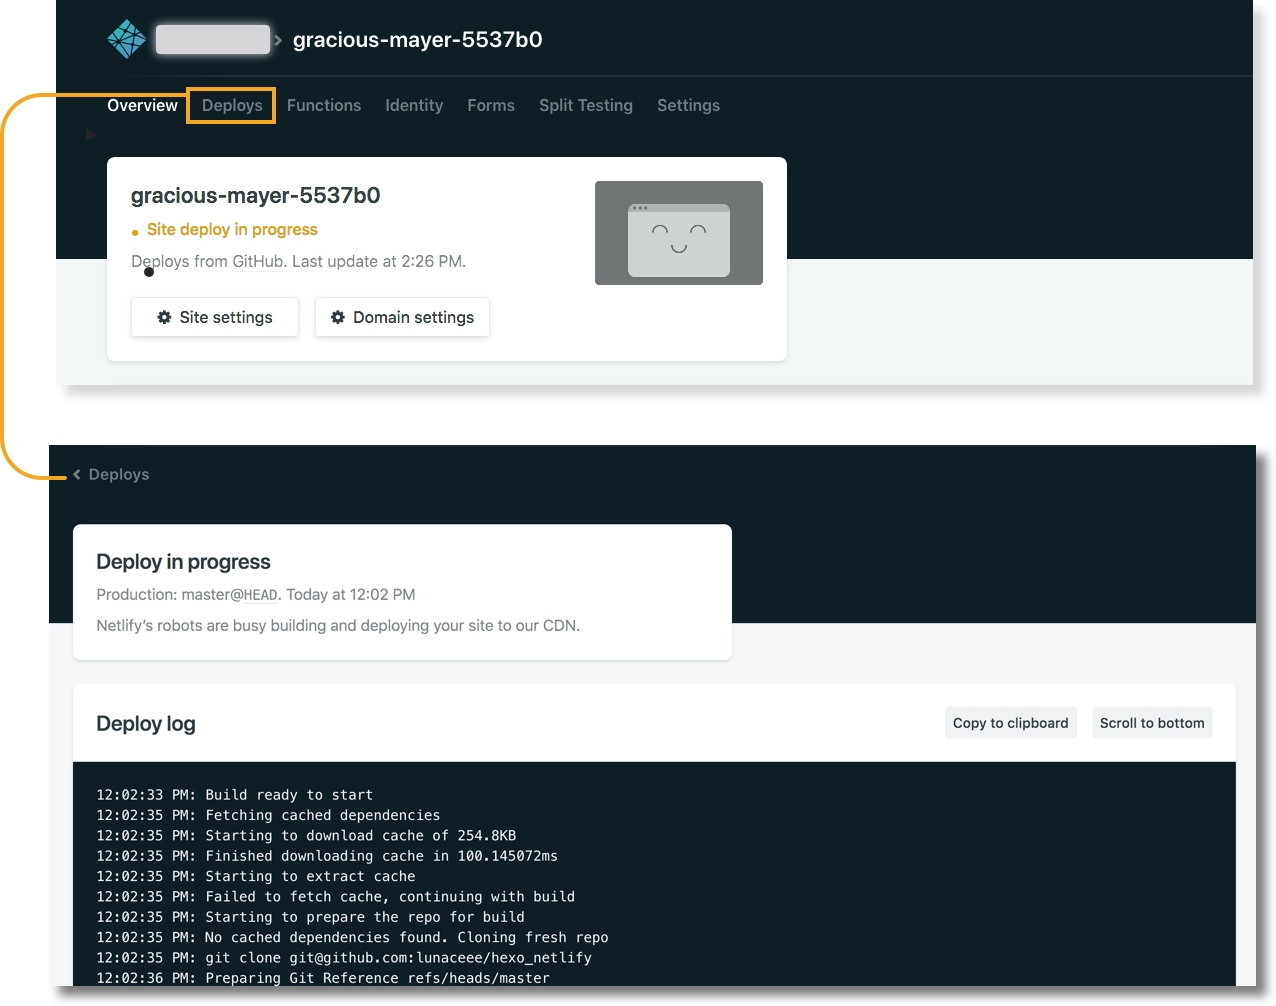
Once you click on the “Deploy site” button, Netlify will start building and deploying your site.
You’ll be taken to the site dashboard. You should see some yellow text on the “Hero Card” indicating that your site is being deployed in progress.
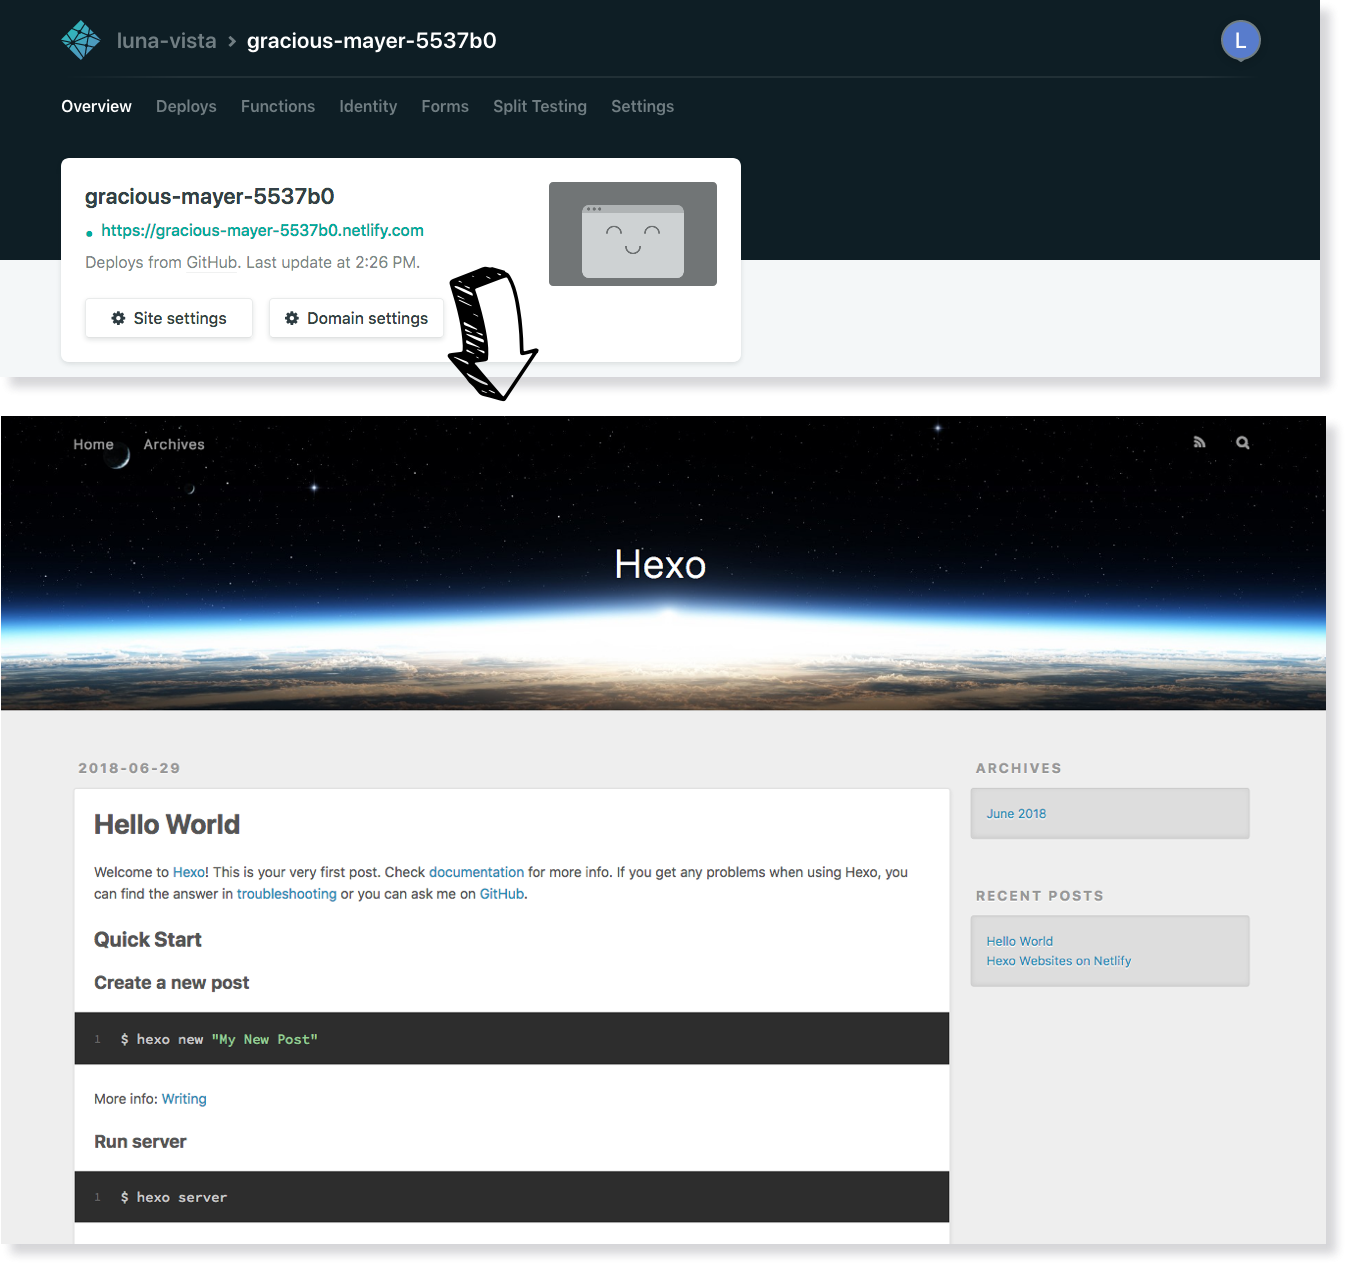
Once the build is finished—this should only take a few seconds–you should now see an auto generated URL of your site in green.
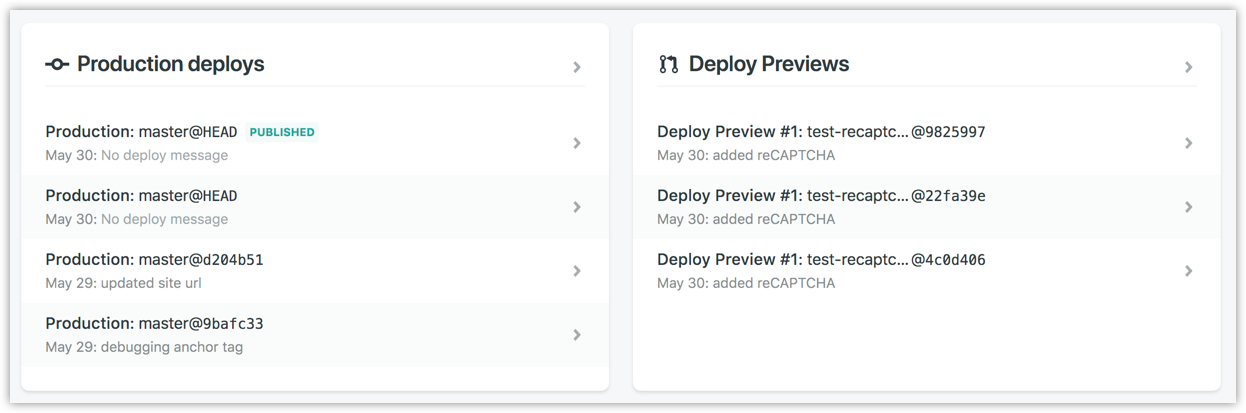
Under your site’s “Overview”, you’ll find the “Production Deploys” section and “Deploy Preview” section side by side. One of the most helpful features of Netlify is “Deploy Preview”. It allows you and your team to preview changes from a branch deploy before publishing your site.
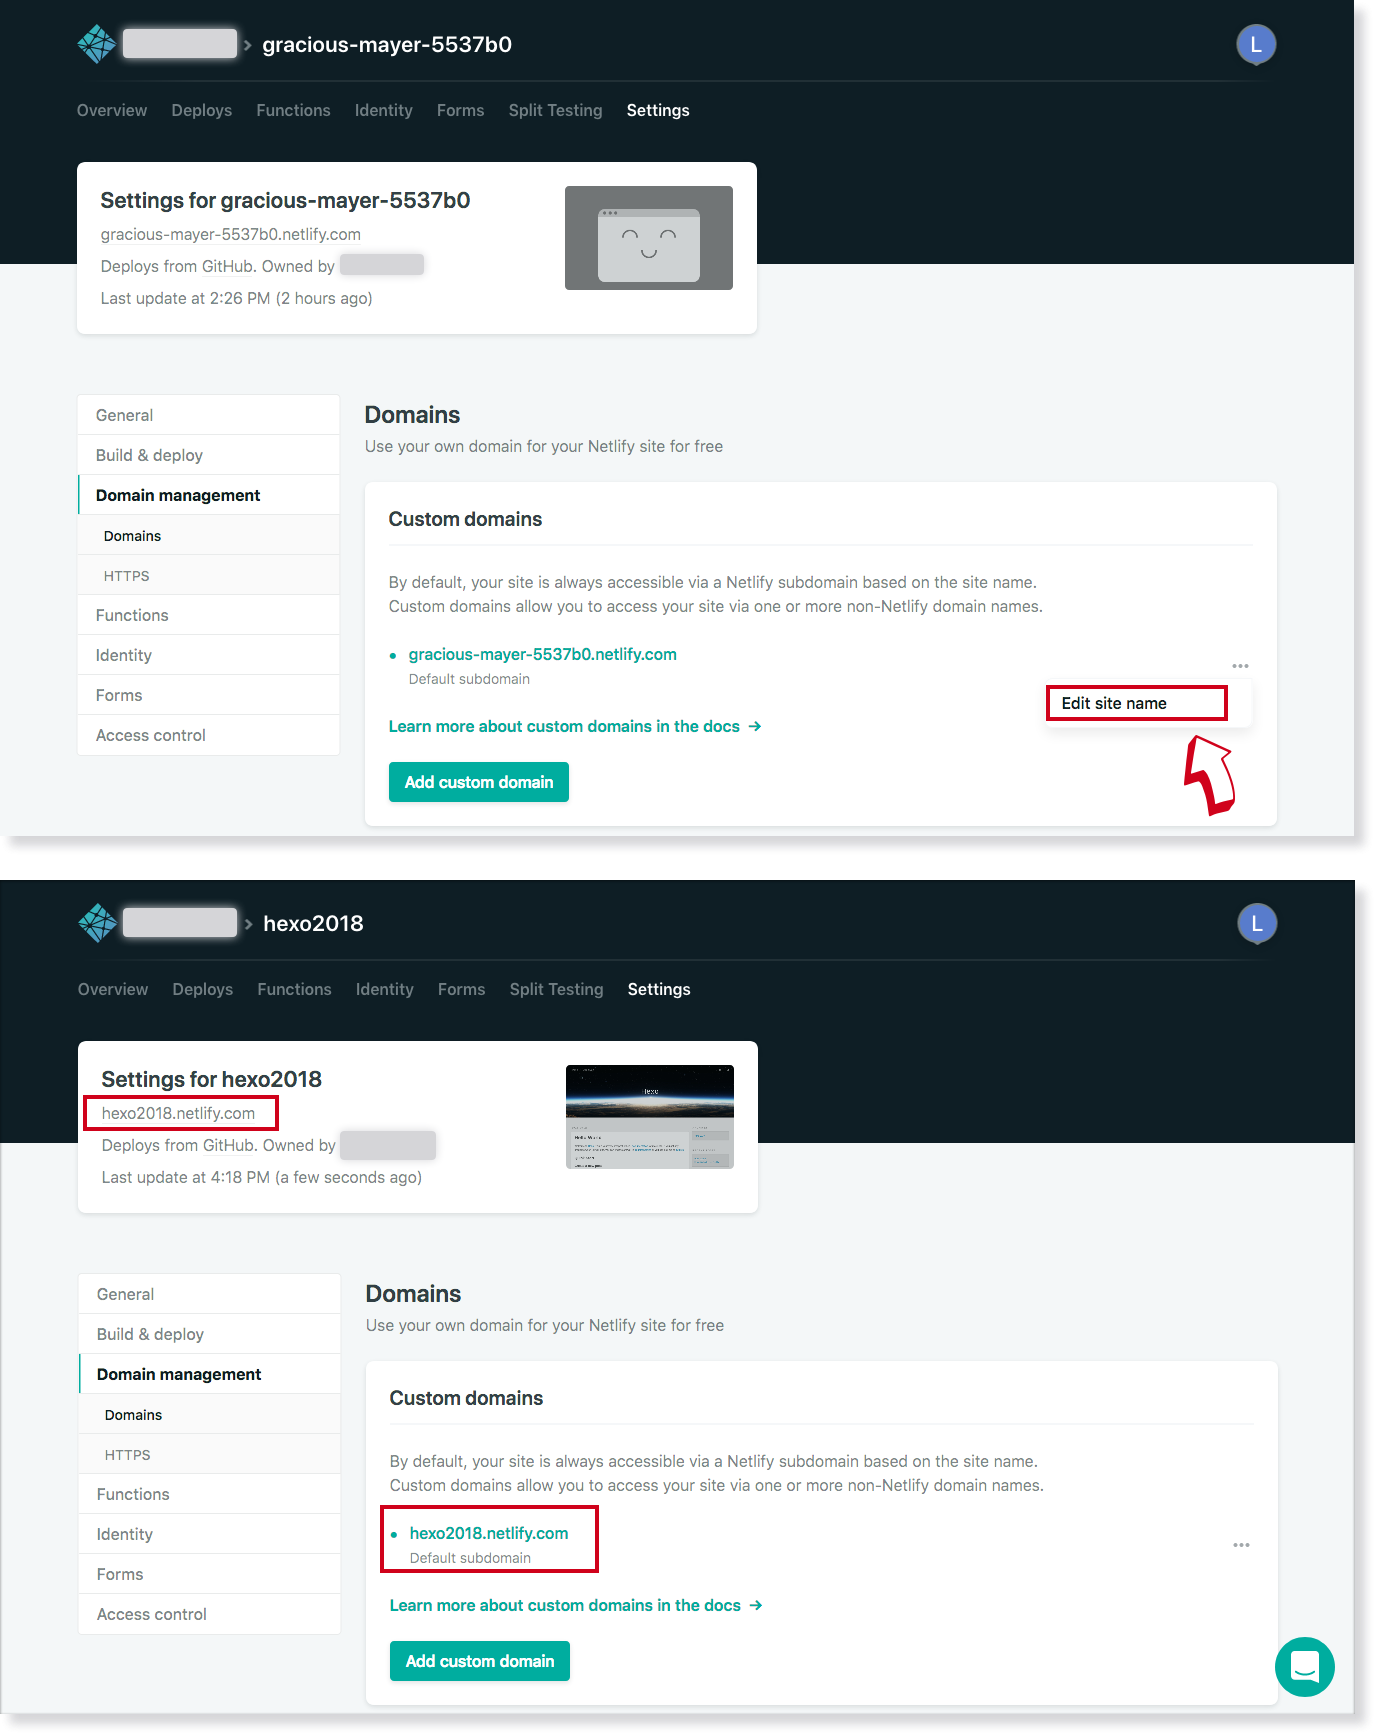
You can customize the subdomain URL under “Domain Settings” to make it look better before you add a domain. You can add or buy domain under https://app.netlify.com/account/dns.
Now every time you push changes to your hosted git repository, Netlify will rebuild and redeploy your site automatically.
Alternatively, you can use netlifyctl to manage and deploy sites on Netlify without leaving your terminal.
You can also add a Deploy to Netlify Button in your README.file to allow others to create a copy of your repository and be deployed to Netlify via one click.
Rsync
Install hexo-deployer-rsync.
$ npm install hexo-deployer-rsync --save |
Edit settings.
deploy: |
| Option | Description | Default |
|---|---|---|
host |
Address of remote host | |
user |
Username | |
root |
Root directory of remote host | |
port |
Port | 22 |
delete |
Delete old files on remote host | true |
verbose |
Display verbose messages | true |
ignore_errors |
Ignore errors | false |
OpenShift
Install hexo-deployer-openshift.
$ npm install hexo-deployer-openshift --save |
Edit settings.
deploy: |
| Option | Description |
|---|---|
repo |
OpenShift repository URL |
message |
Customize commit message (Default to Site updated: {{ now('YYYY-MM-DD HH:mm:ss') }}) |
FTPSync
Install hexo-deployer-ftpsync.
$ npm install hexo-deployer-ftpsync --save |
Edit settings.
deploy: |
| Option | Description | Default |
|---|---|---|
host |
Address of remote host | |
user |
Username | |
pass |
Password | |
remote |
Root directory of remote host | / |
port |
Port | 21 |
ignore |
Ignore the files on either host or remote | |
connections |
Connections number | 1 |
verbose |
Display verbose messages | false |
SFTP
Install [hexo-deployer-sftp]. Deploys the site via SFTP, allowing for passwordless connections using ssh-agent.
$ npm install hexo-deployer-sftp --save |
Edit settings.
deploy: |
| Option | Description | Default |
|---|---|---|
host |
Address of remote host | |
user |
Username | |
pass |
Password | |
remotePath |
Root directory of remote host | / |
port |
Port | 22 |
privateKey |
Path to a ssh private key | |
passphrase |
Optional passphrase for the private key | |
agent |
Path to the ssh-agent socket | $SSH_AUTH_SOCK |
Other Methods
All generated files are saved in the public folder. You can copy them to wherever you like.